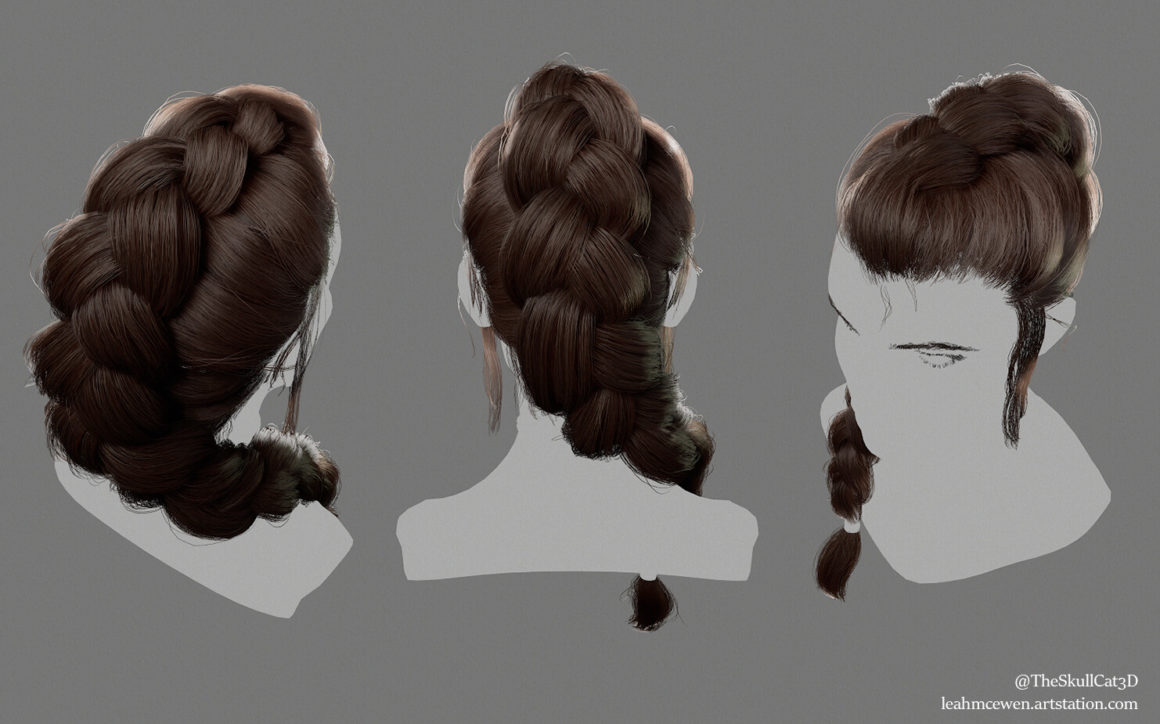
Get ready to learn a new CG braiding technique and update your groom’s hairstyle with this tutorial by Groom artist Leah McEwen.
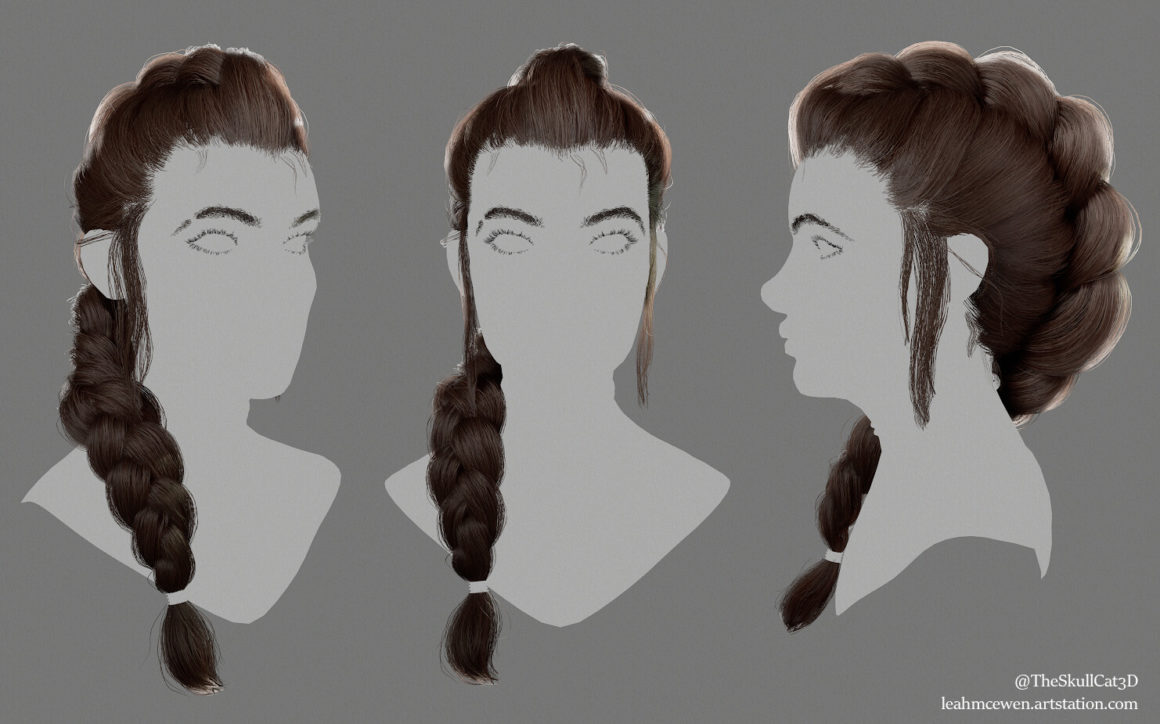
I wanted to share a rough overview of how I go about making and rendering hair cards. After sharing this idea on Twitter I got a huge response, so I added a few more screenshots and gifs that I hope will help with some of the more awkward parts. I originally started this asset with the intention to render in Marmoset Toolbag but switched over to UE5 near completion and really liked the results I was getting.
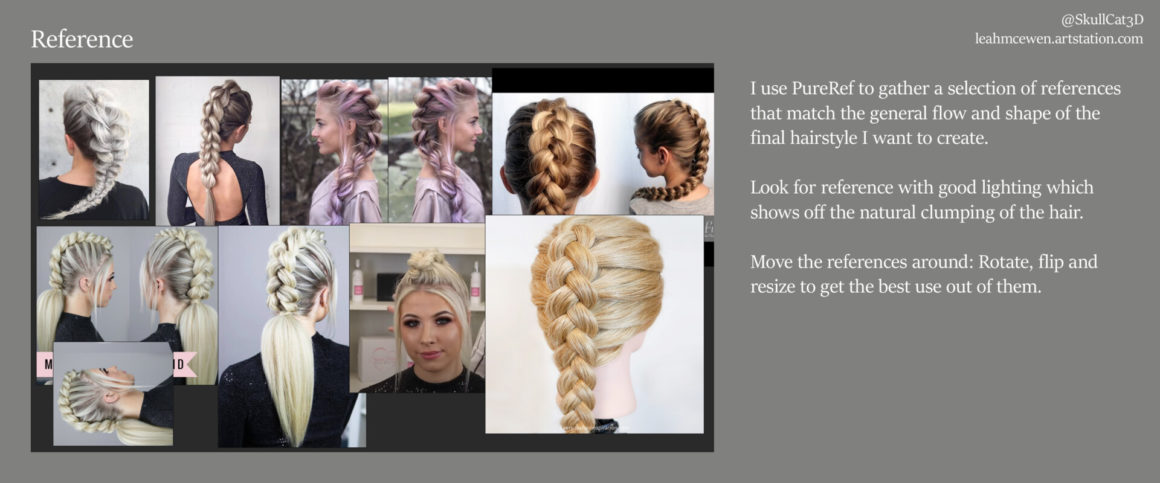
Reference
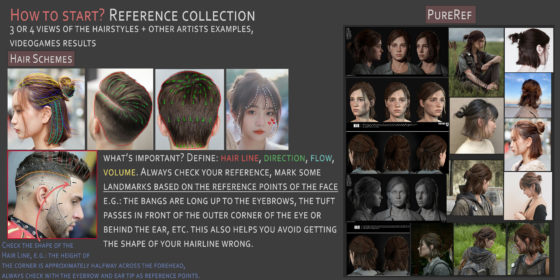
I use PureRef to gather a selection of references that match the general flow and shape of the final hairstyle I want to create. Look for reference with good lighting which shows off the natural clumping of the hair. Move the references around: Rotate, flip and resize to get the best use out of them.
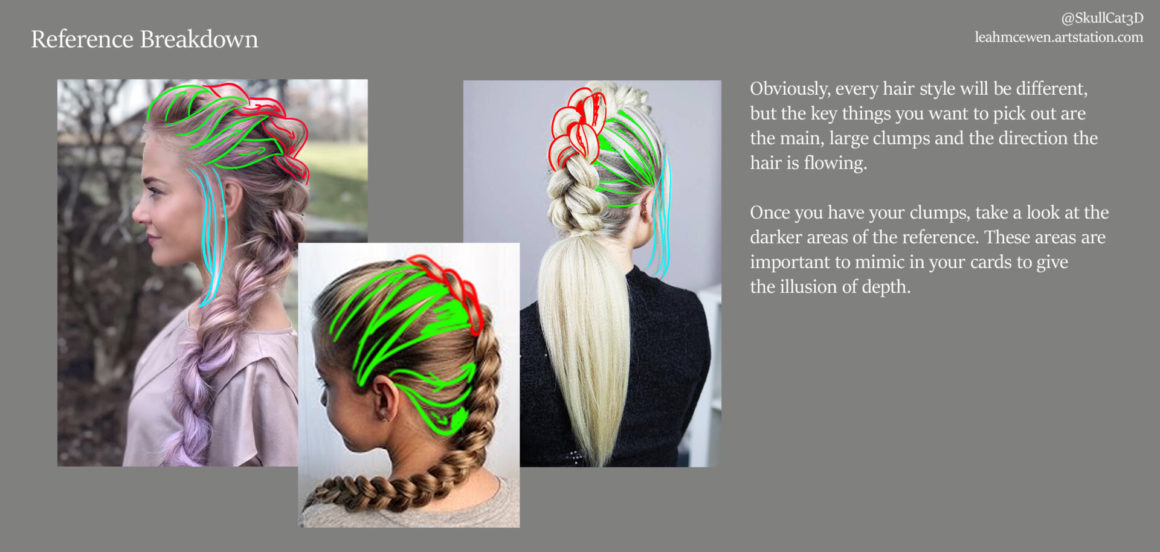
Reference breakdown
It’s worth thinking about the hair type you’re trying to mimic. For this hairstyle, I was looking for something around 2a or 2b, but once you pull the hair back into the braid, you loose a lot of the waviness
Your textures should do a lot of the heavy lifting in terms of getting your hair type across to the viewer. Additionally, you can always add more curls and waves by how you place the individual cards and clumps.

Obviously, every hair style will be different, but the key things you want to pick out are the main, large clumps and the direction the hair is flowing.
Once you have your dumps, take a look at the darker areas of the reference. These areas are important to mimic in your cards to give the illusion of depth.
XGen setup
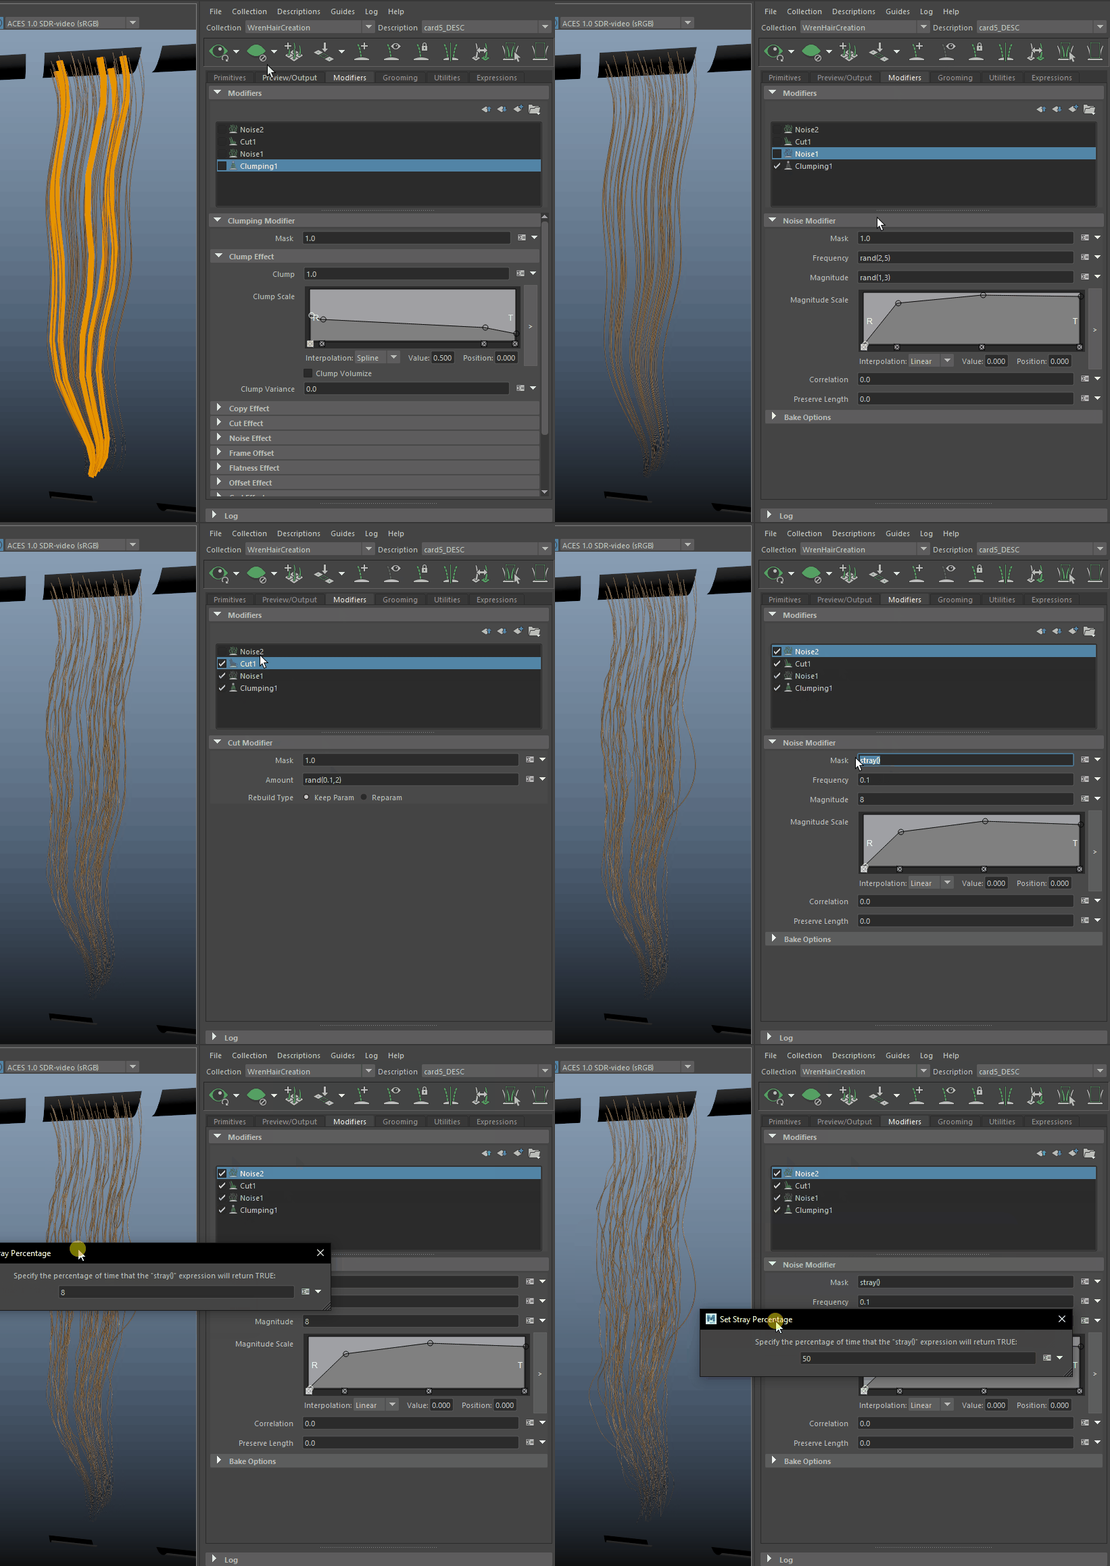
I use XGen Core to create my hair textures.
Each card is it’s own Description with it’s own guides and modifiers.
The cards that the hairs are generated on are slightly curved to add a more natural incline to the roots. When learning XGen, I used Jesus FC’s YouTube series. Check out jesusfc.net
I spend a lot of time just moving sliders around and trying different modifiers and setups until I get something I like.
I recommend spending a while trying out different modifiers and digging through the different options, especially the Clumping modifier.
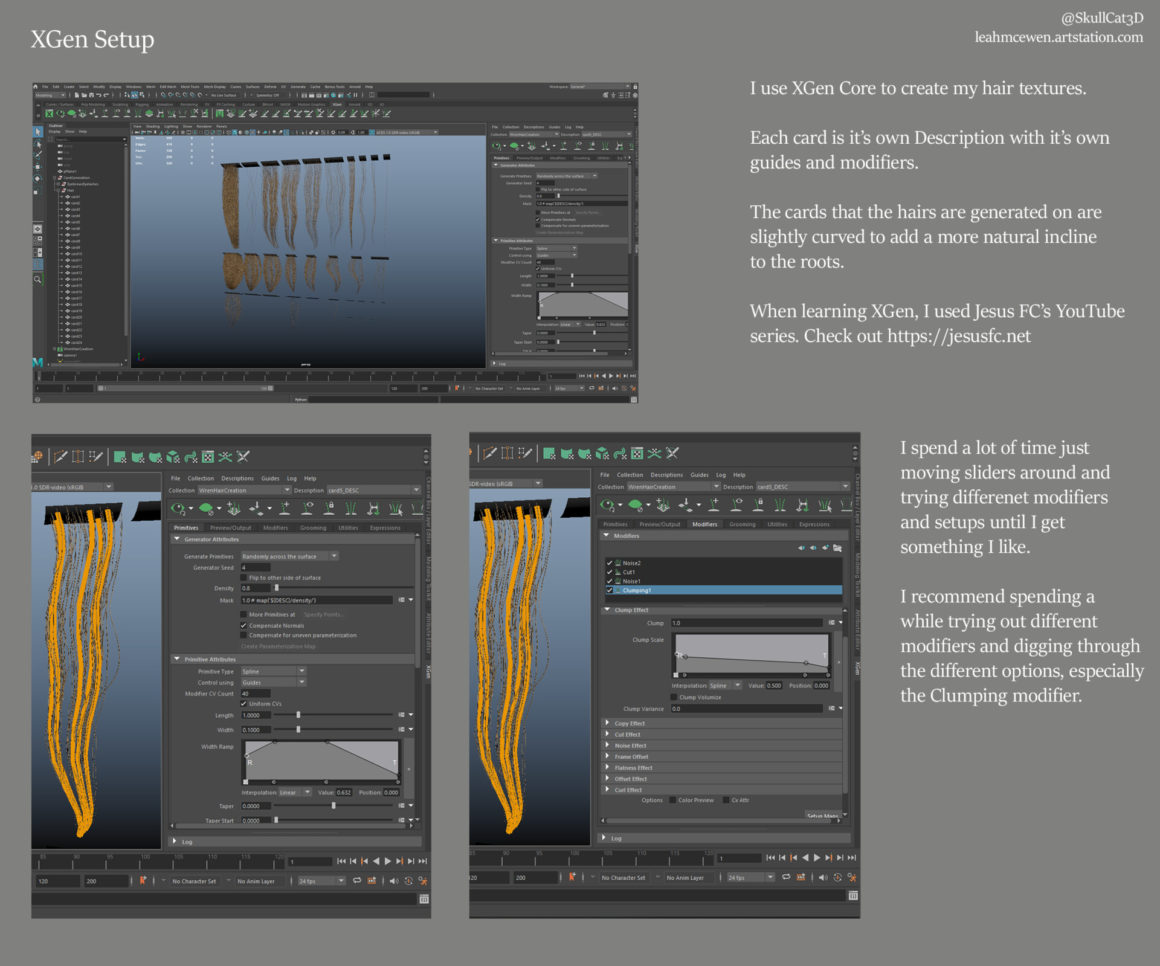
I tend to use the same modifiers and often use multiples of similar modifiers and layer them up.
XGen render
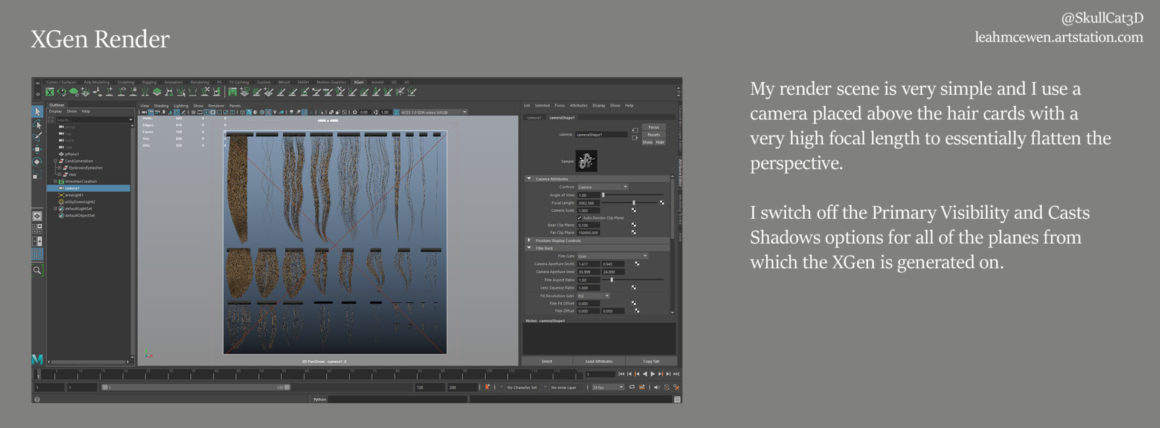
My render scene is very simple and I use a camera placed above the hair cards with a very high focal length to essentially flatten the perspective.
I switch off the Primary Visibility and Casts Shadows options for all of the planes from which the XGen is generated on.
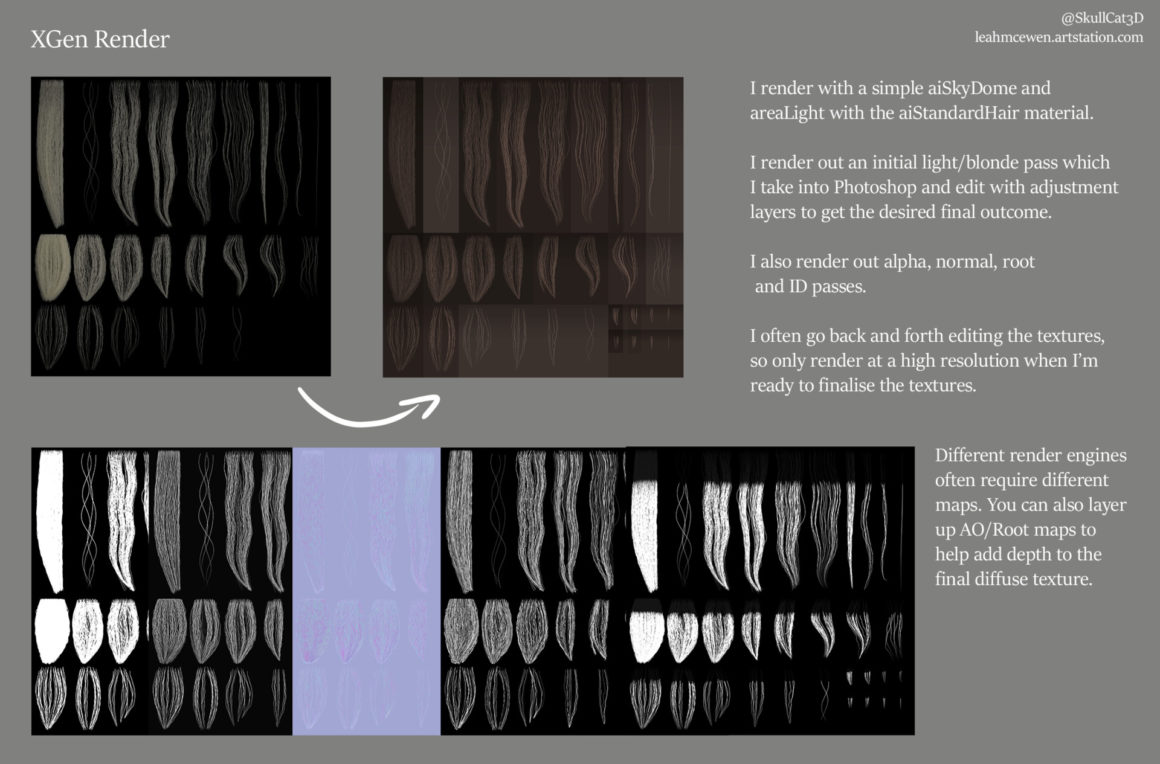
I render with a simple aiSkyDome and areaLight with the aiStandardHair material.
I render out an initial light/blonde pass which I take into Photoshop and edit with adjustment layers to get the desired final outcome.
I also render out alpha, normal, root and ID passes. I often go back and forth editing the textures, so only render at a high resolution when I’m ready to finalize the textures.
Different render engines ften require different aps. You can also layer p AO/Root maps to help add depth to the final diffuse texture.
Card placement
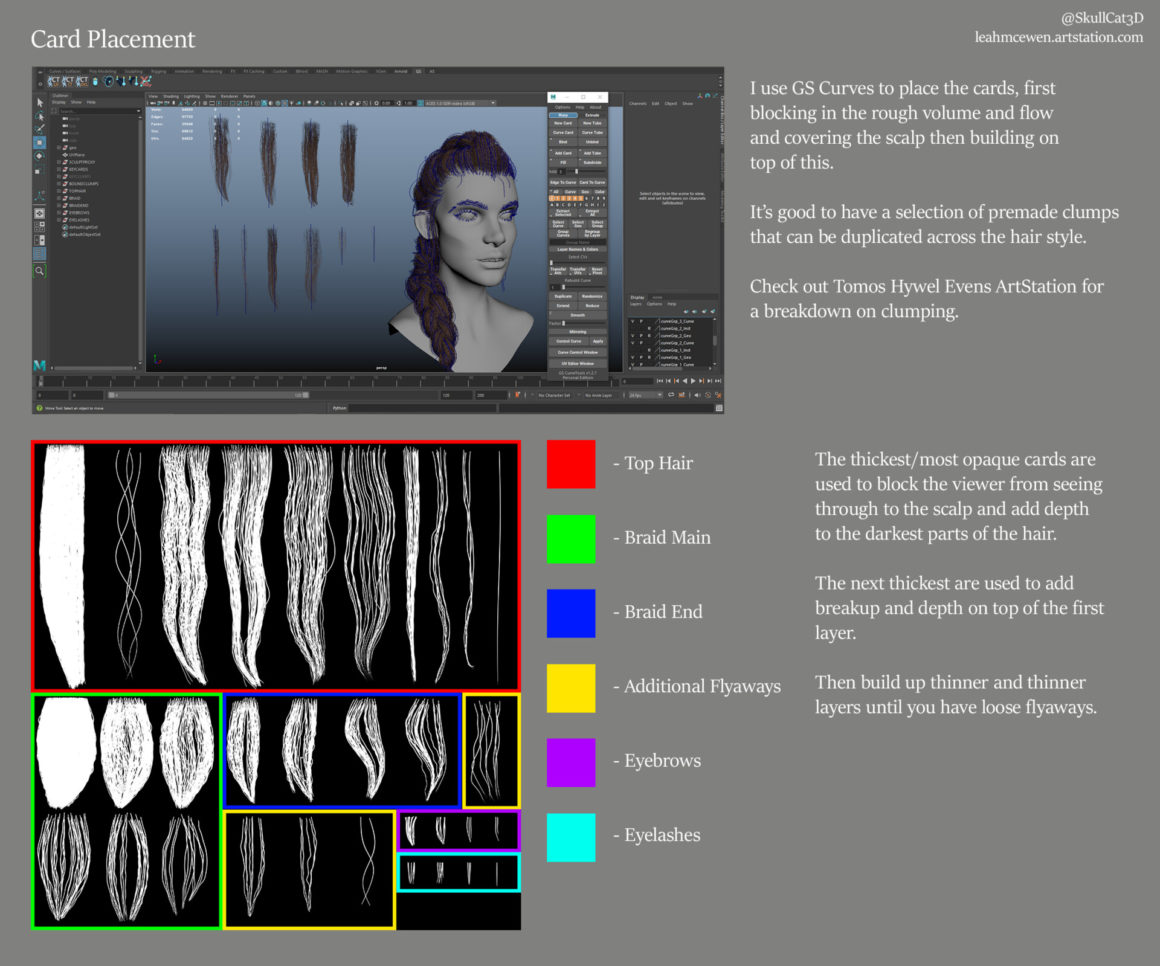
I use GS Curves to place the cards, first blocking in the rough volume and flow and covering the scalp then building on top of this. It’s good to have a selection of premade clumps that can be duplicated across the hair style.
Check out Tomos Hywel Evens ArtStation for a breakdown on clumping. The thickest/most opaque cards are used to block the viewer from seeing through to the scalp and add depth to the darkest parts of the hair.
The next thickest are used to add breakup and depth on top of the first layer. Then build up thinner and thinner layers until you have loose flyaways.
Here you can see a scene overview and how you can move bound curves into place and then rotate them around to the desired position. Check out George Sladkovsky on ArtStation and YouTube for the Plugin.
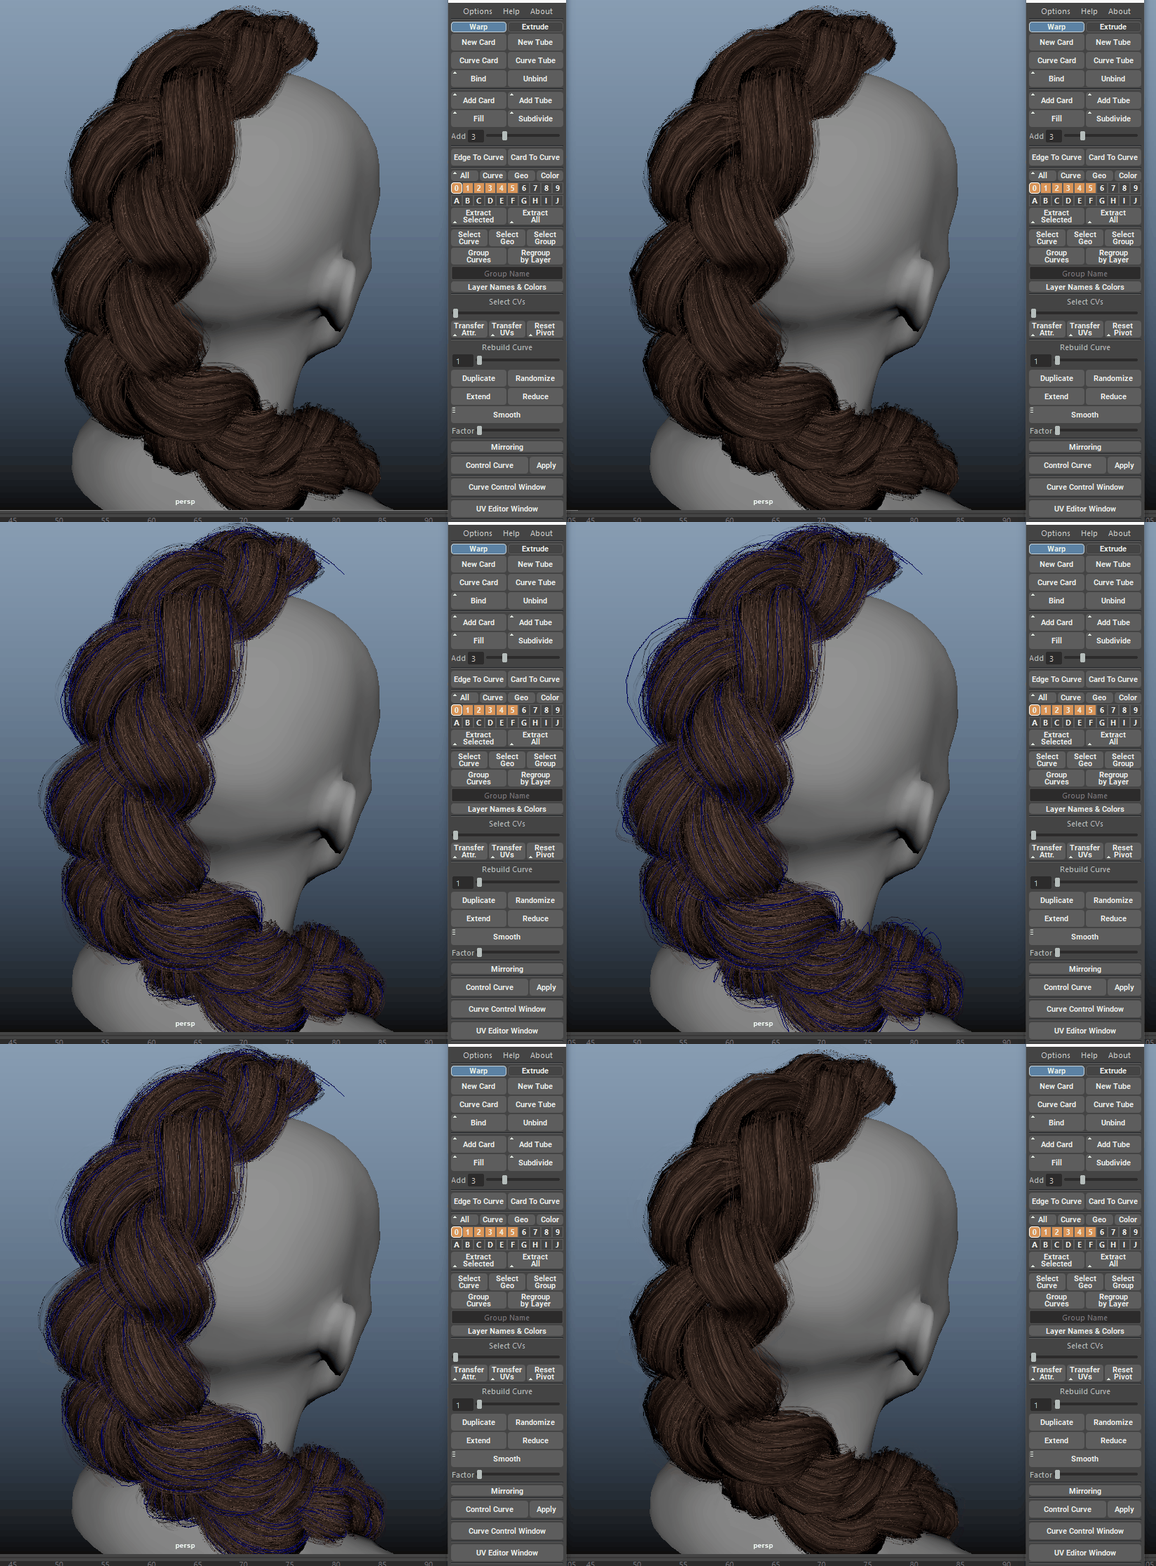
Here you can see the base of my braid made from the pre-made chunks, then the layered additional cards and flyaways.

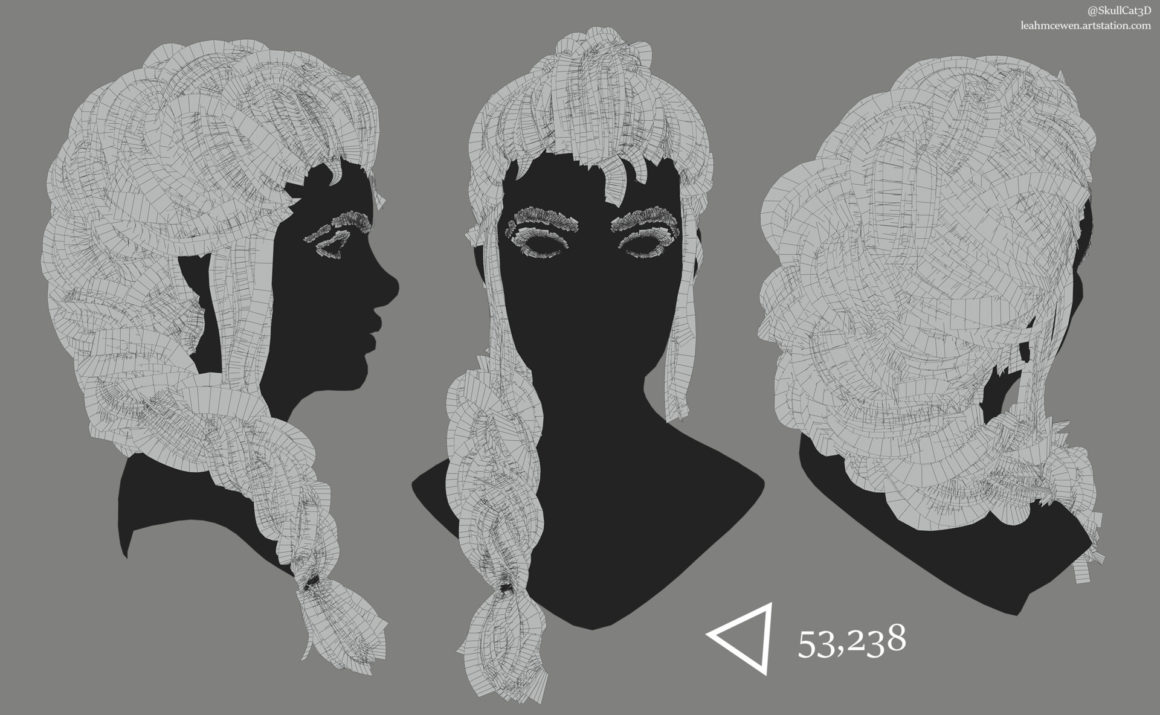
Rendering in Unreal Engine 5
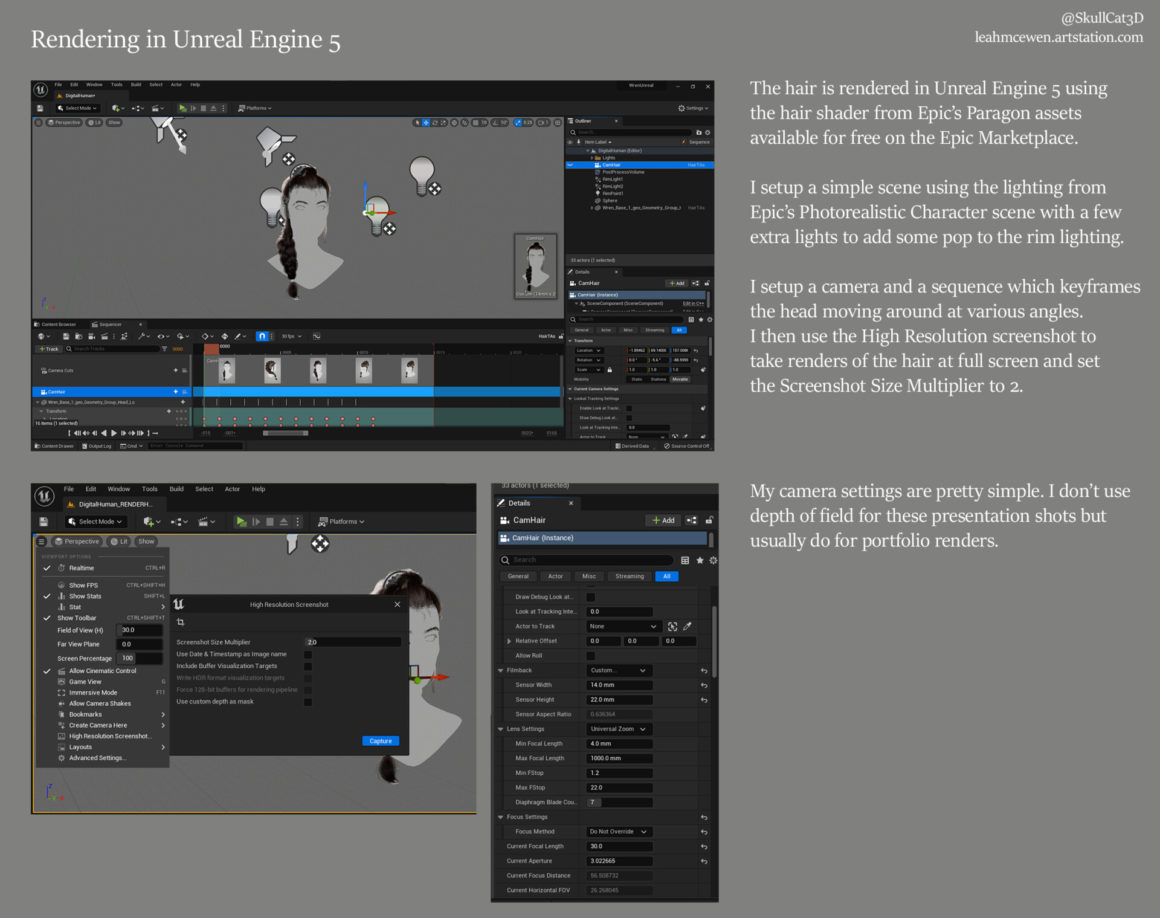
The hair is rendered in Unreal Engine 5 using the hair shader from Epic’s Paragon assets available for free on the Epic Marketplace.
I setup a simple scene using the lighting from Epic’s Photorealistic Character scene with a few extra lights to add some pop to the rim lighting.
I setup a camera and a sequence which key-frames the head moving around at various angles. I then use the High Resolution screenshot to take renders of the hair at full screen and set the Screenshot Size Multiplier to 2.
My camera settings are pretty simple. I don’t use depth of field for these presentation shots but usually do for portfolio renders.
Material in Unreal Engine 5
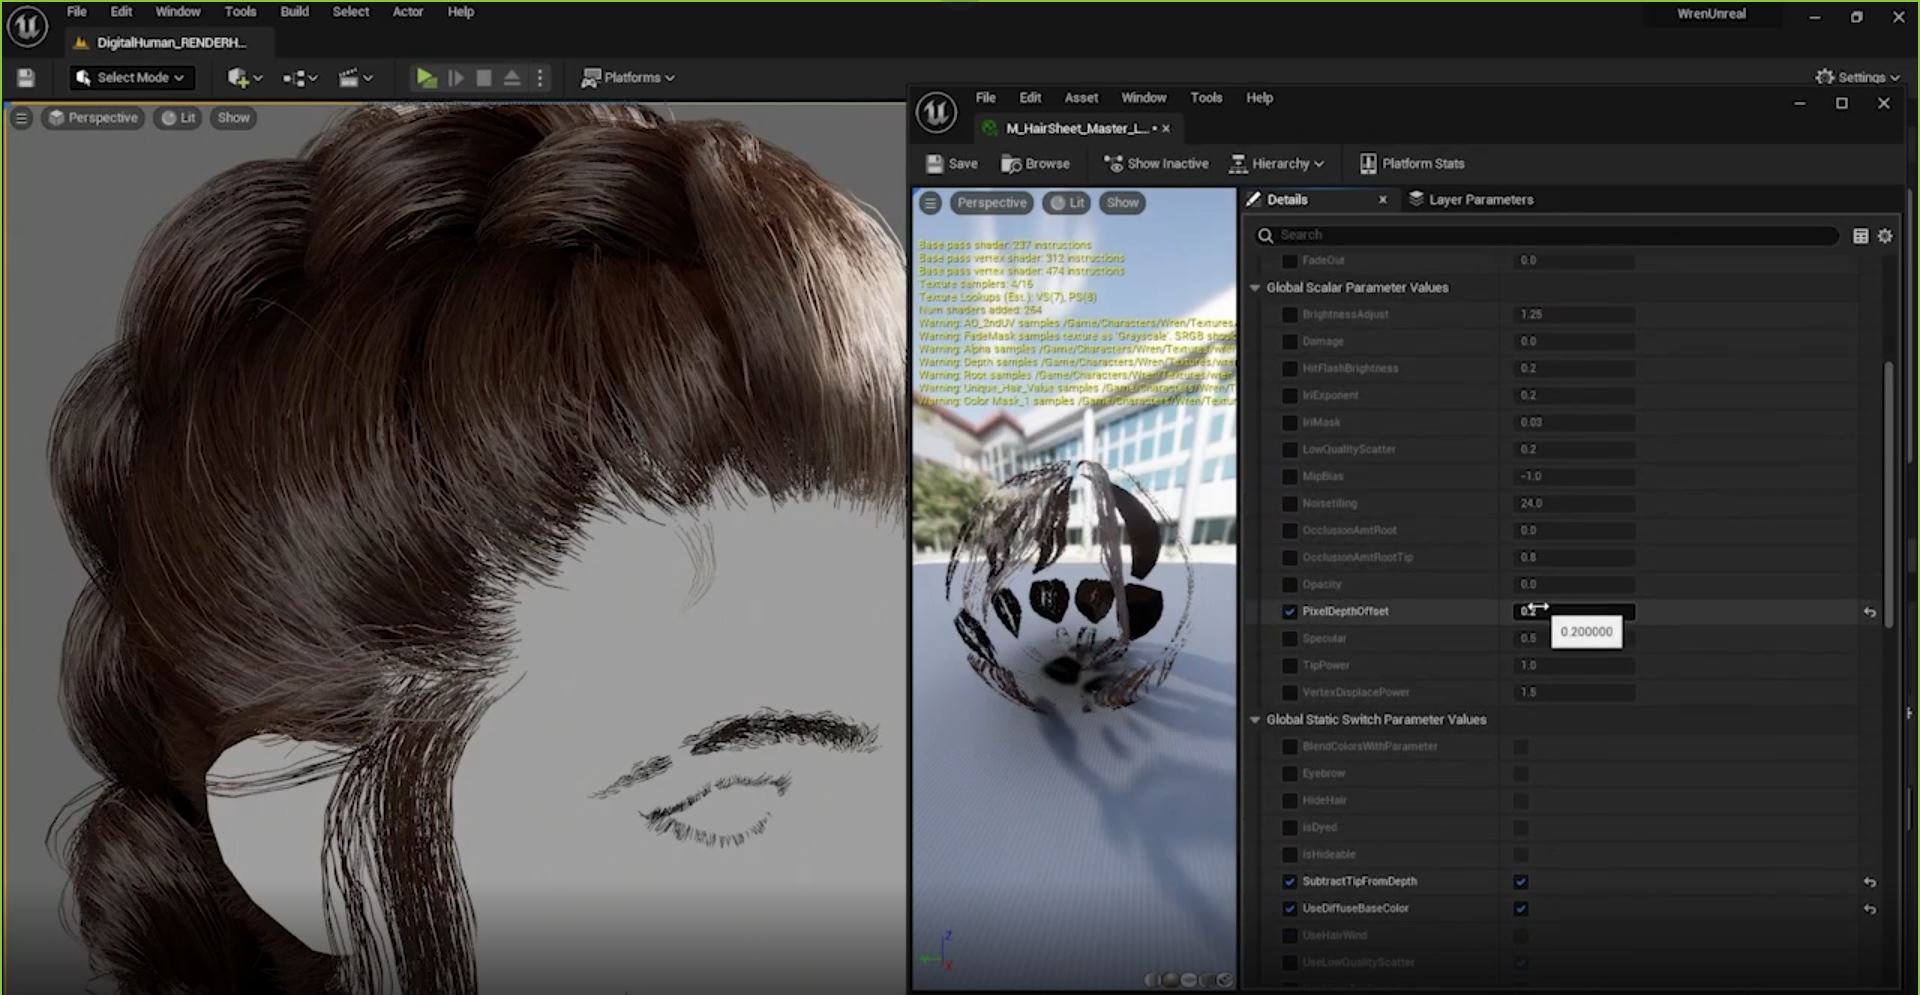
The Paragon Hair Shader is dense! You will not need all of the options in it and if you know Unreal it may be a good idea to customize your own version.
I don’t use a lot of the options in the Paragon Hair Shader and keep it pretty basic. The main thing is to tweak Roughness and Specular until you get the hair looking the way you want.
For this hair I also made a diffuse map and so use that instead of a root and tip color.
I use the same setup for the eyebrows and eyelashes but have a separate material instance with the Eyebrow parameter checked to true.

Join our community & Get inspired by TOP artists:
Most popular Groom references


Read more about groom references or visit our website:
Explore GROOM category


