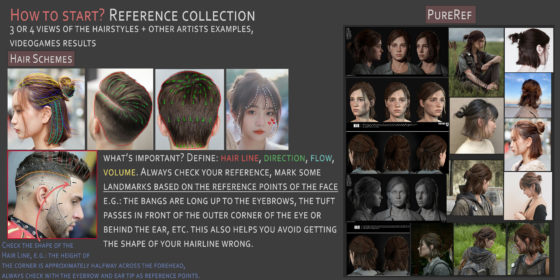
I get asked quite a bit how i do my real-time hair using cards, So this is my attempt at explaining how i do exactly that!
First, you need to make your cards. I personally use @Fibershop3d right now, but hairTG by @_olau_ is also a great tool. I encourage you to try out both and see what you like the most.
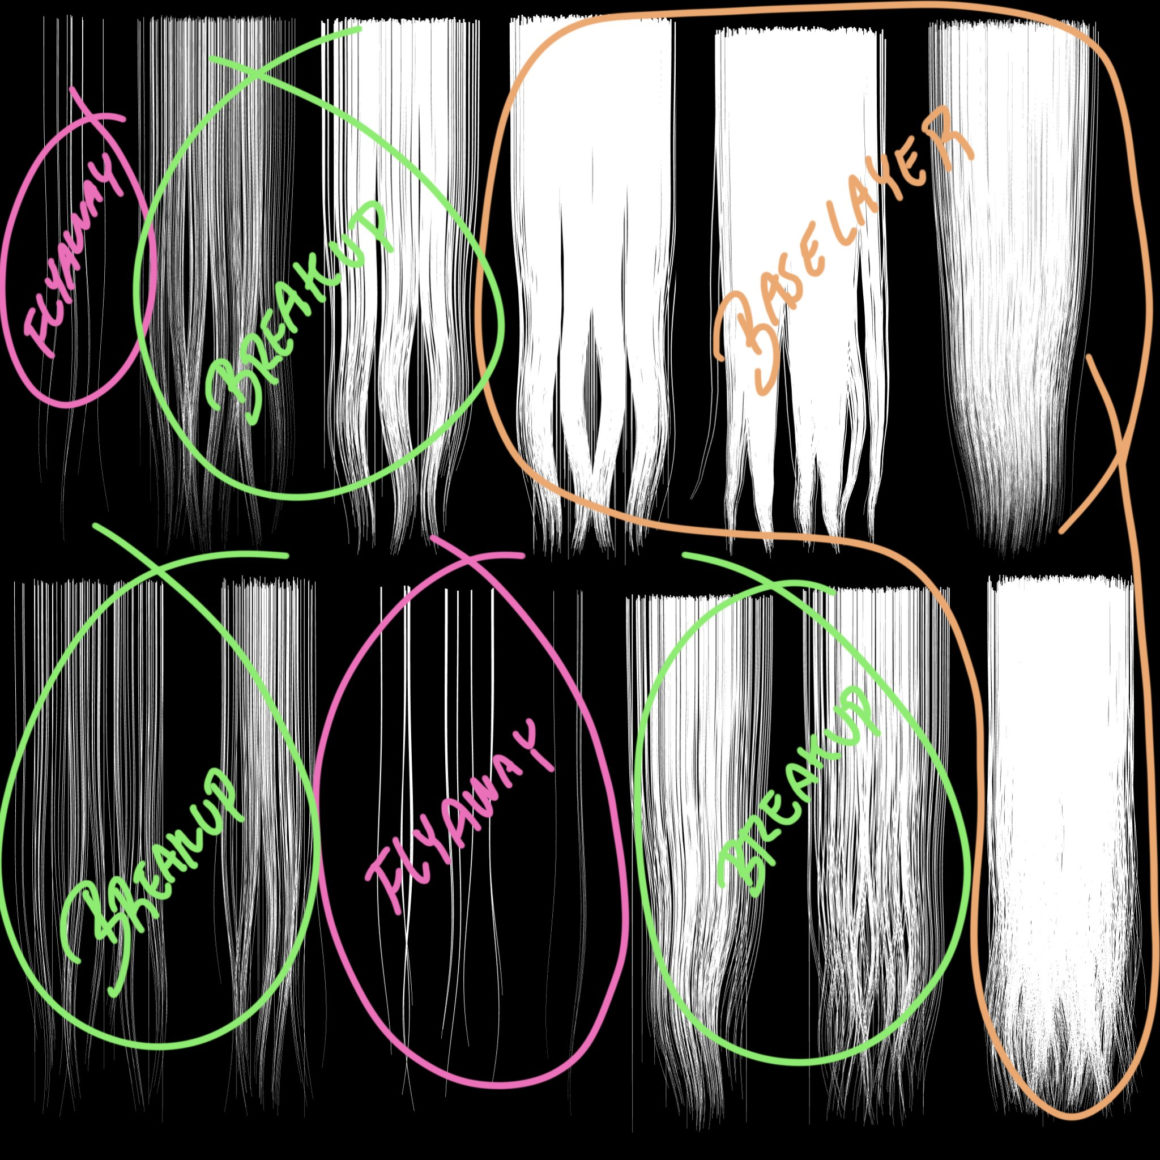
Here you want to make sure you have cards that can be used for both the base layer, breakup layer, and for flyaways. Above is an example of what that could look like.
Hair is kind of like an onion when it comes to building it, not that it makes you want to cry, but in terms of structure. It has several layers. I currently use ZBrush for placement, but GS curvetool for Maya is also great. Again, try out the different tools available!
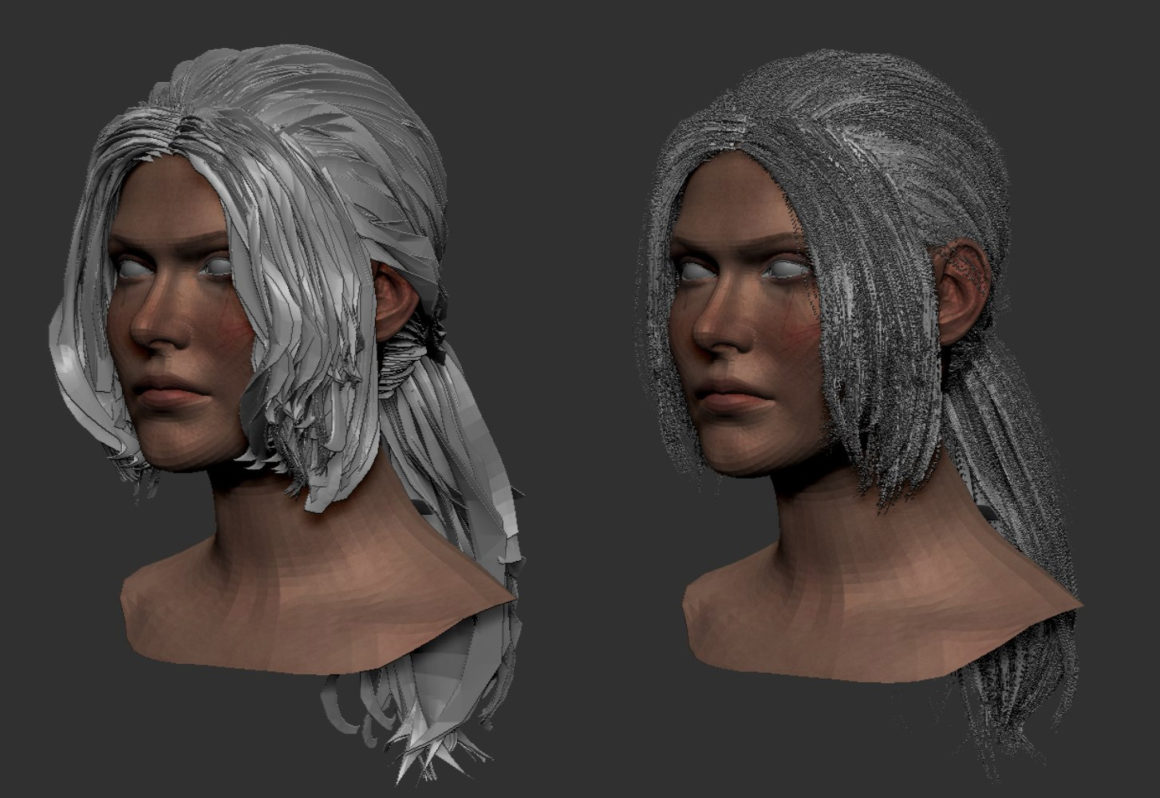
You can set up the cards in ZBrush just like you would in Maya or any other software of your choice. Align all the cards in rows with the correct UVs and texture. Now you can start duplicating the the hair from the rows and place it.

Base layer
So, first layer of this hair-onion is the base layer. This is where you will be using your thickest and most dense cards (in terms of hair, not geometry). Be mindful of not making the cards too wide when placing them, since this will make the final result look very.. cardy.

Just dont go too overboard on the geo, and always keep and eye on how much you are spending. However, you can always reduce it a bit in a modeling software afterwards if needed.
For the base layer, you really Want to make sure you got the flow and direction established. Try to always get a nice S-shape on your cards instead of placing them dead straight on to the mesh. This will make it look a lot better in the end. Remember that gravity affects hair.
Also, no need to place cards that wont be seen. Try to place cards where it contributes to the silhouette and volume. It doesnt have to grow directly out of the head from everywhere.

The move brush (and some bruteforce) is your friend! Place the roots first, mask them and move the rest down with the pivot – then use the move brush to get that nice shape in!
Brakeup layer
Now that the base layer is done, it is time to place the breakup layer. This Layer is here to follow the overall flow and direction we established in the base layer, adding some volume and to “break-up” the silhouette a bit, so we get some nice looking convincing hair in the end.
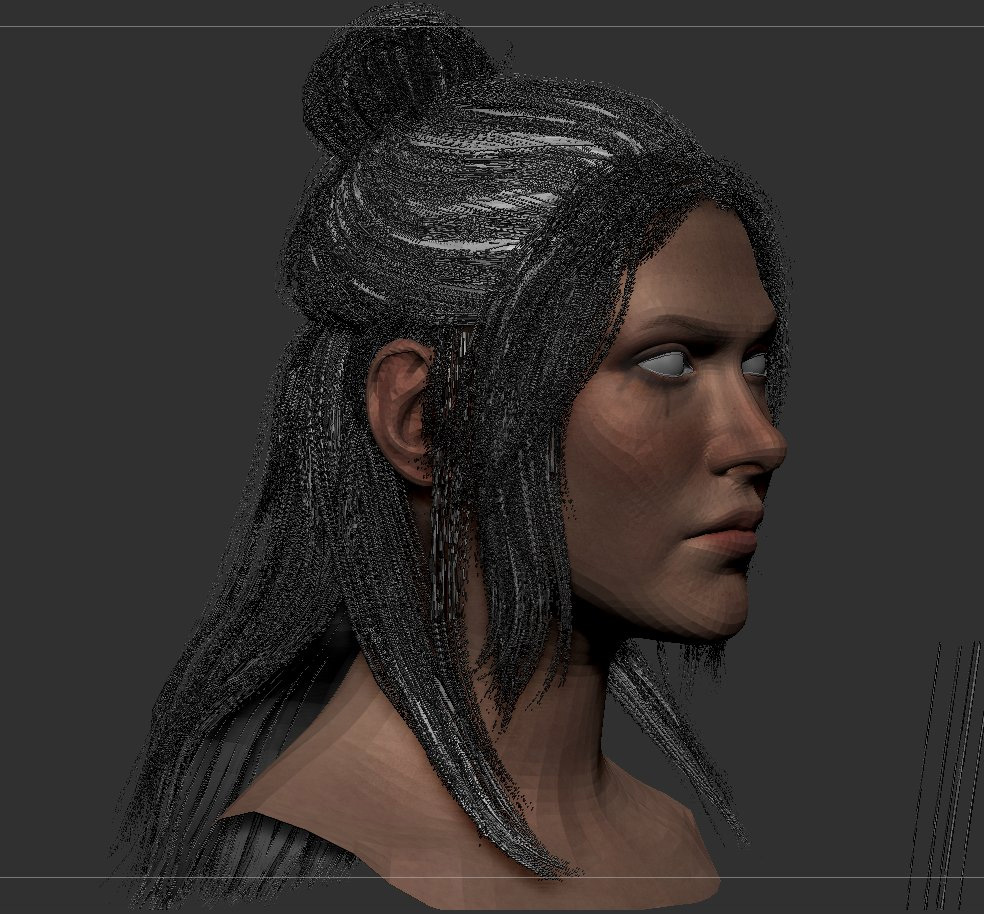
Keep using nice narrow cards here, you want to try and cover up the base layer quite a bit using your less dense cards! : )
Flyaways
Last but not least – Flyaways! And they are exactly as they are called – those little pesky hairs that stray away from the rest This is very important for that final touch and to add some extra interest in the silhouette.
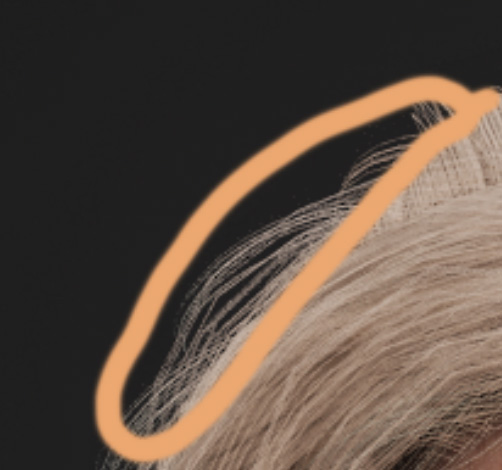
Now time to render – I use UE5 and for the renders of this hair i use the hair shader that comes with the Paragon characters, which can be downloaded for free. I just modify the shader a bit so it is to my liking.
Bonus
Bonus-tip: if you want some hair-movement in your renders, you can use cloth-sim with some low values and paint it in. I did that for my previous project and it turned out quite nice!
This is pretty much the steps i take when i do haircards! As with anything, there is a billion ways to go about it so i encourage you to be curious and try different methods out for yourself.
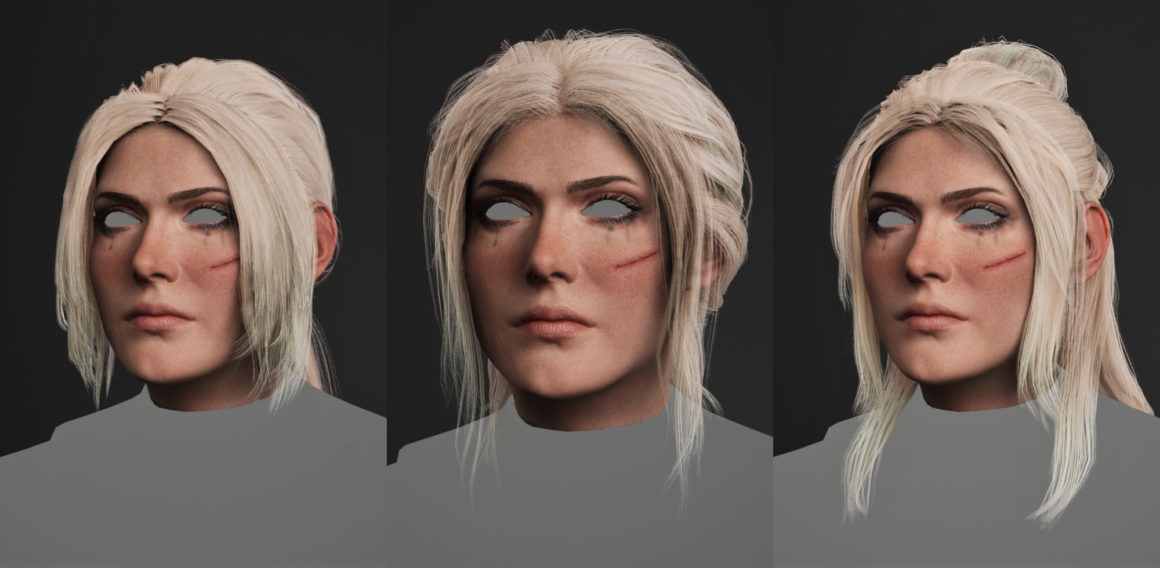
If you have some good tips, tricks, or something i didn’t cover, feel free to leave a comment so we can all get smarter!
Another thing, don’t let people tell you that hair is the worst thing and that it is absolutely horrible. I was always told that in the beginning of my 3D journey, and it turns out i really enjoy it! Don’t be discouraged – Hair is fun! YOU GOT THIS
Full Twitter thread by Helena Hansen: https://twitter.com/HelenaEHHansen/status/1592197153065402374
Join our community & Get inspired by TOP artists:
Most popular Groom references


Read more about groom references or visit our website:
Explore GROOM category


