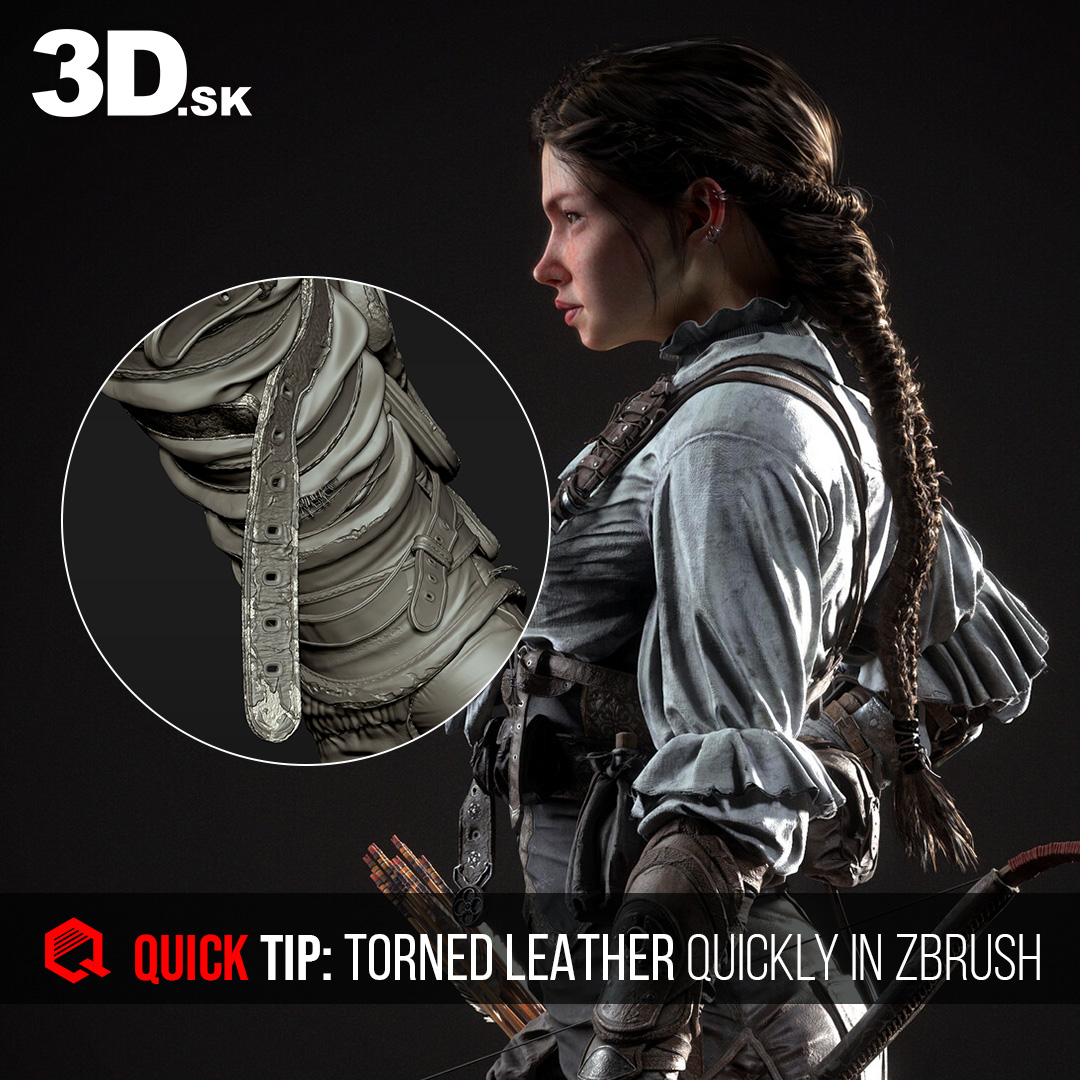
Expressing torned Leather quickly and easily in a Zbrush
Discover SEOK JIUNG’s expert technique for designing custom torn leather details and in ZBrush. This comprehensive tutorial provides step-by-step instructions to help you achieve realistic leather effects, improving both the intricacy and quality of your textures. A must-watch for artists eager to enhance their models with fine surface details efficiently! A big thank you to Seok Jiung for sharing this Quick Tip with us.
Master torn leather in ZBrush and unlock advanced techniques to elevate your artistry.
— mirec from 3d.sk
If you express it in Substance Painter, you can express the damage of leather brilliantly, but I tend to express it in ZBrush when I work
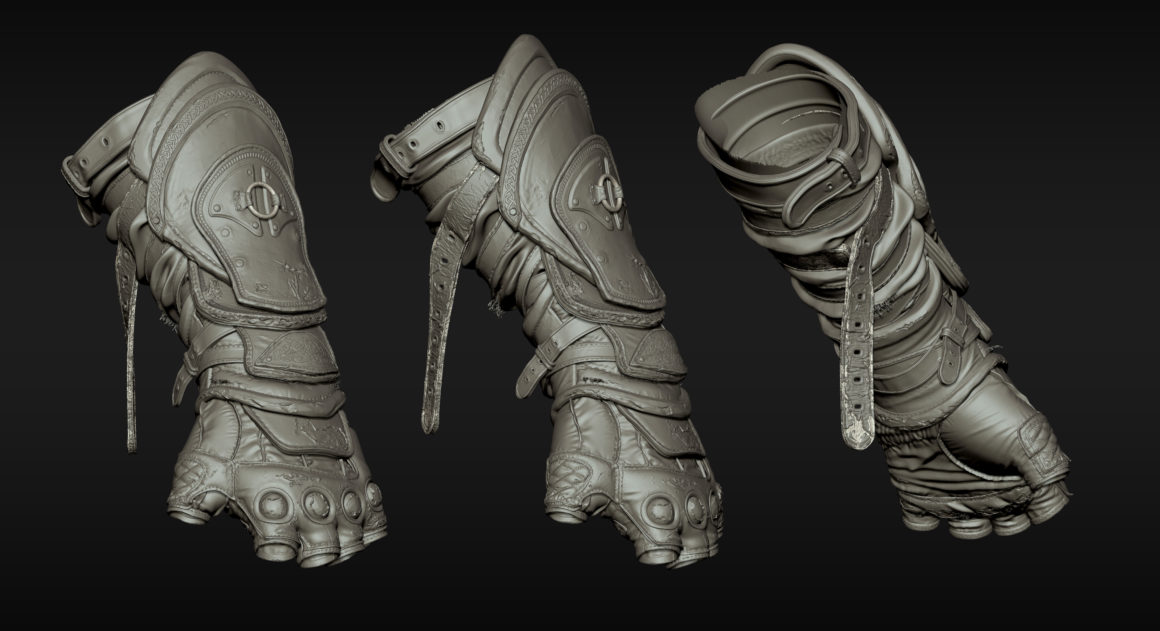
1. Low Poly Model
First, create a low poly with a well-topology then unfold the UV.
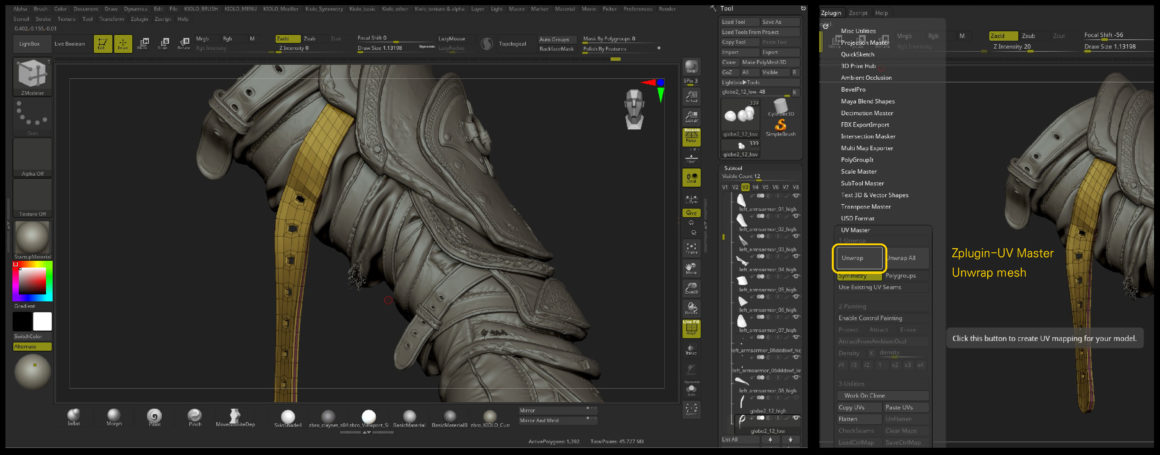
2. Sculpting
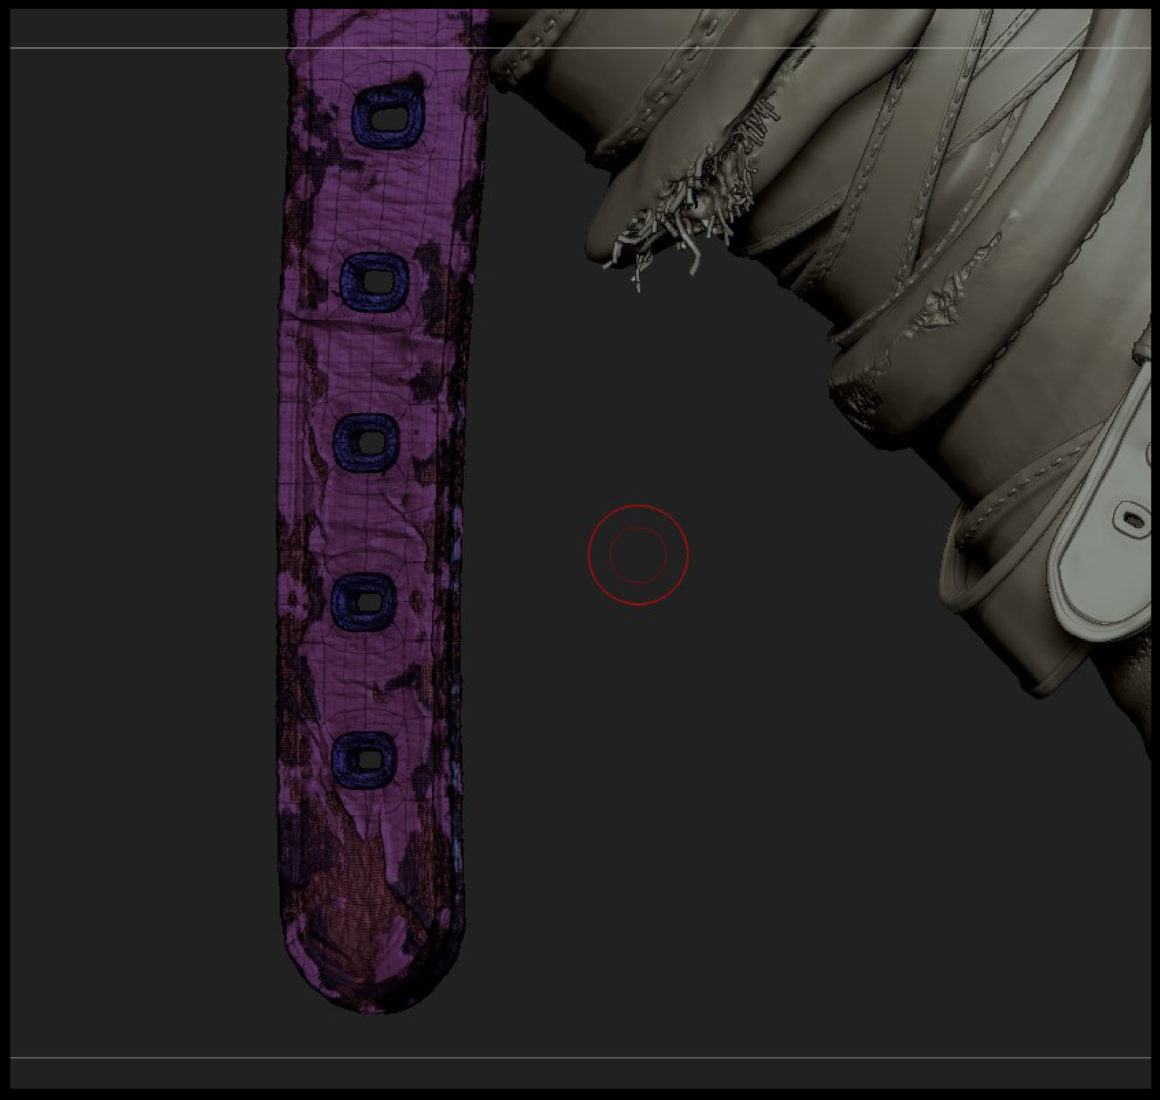
Sculpting by expressing the overall leather well. I divided the polygroup and expressed the edge of the leather with ‘Surface-Noise’ on the red part. The leather tear should be expressed in the final sculpting.
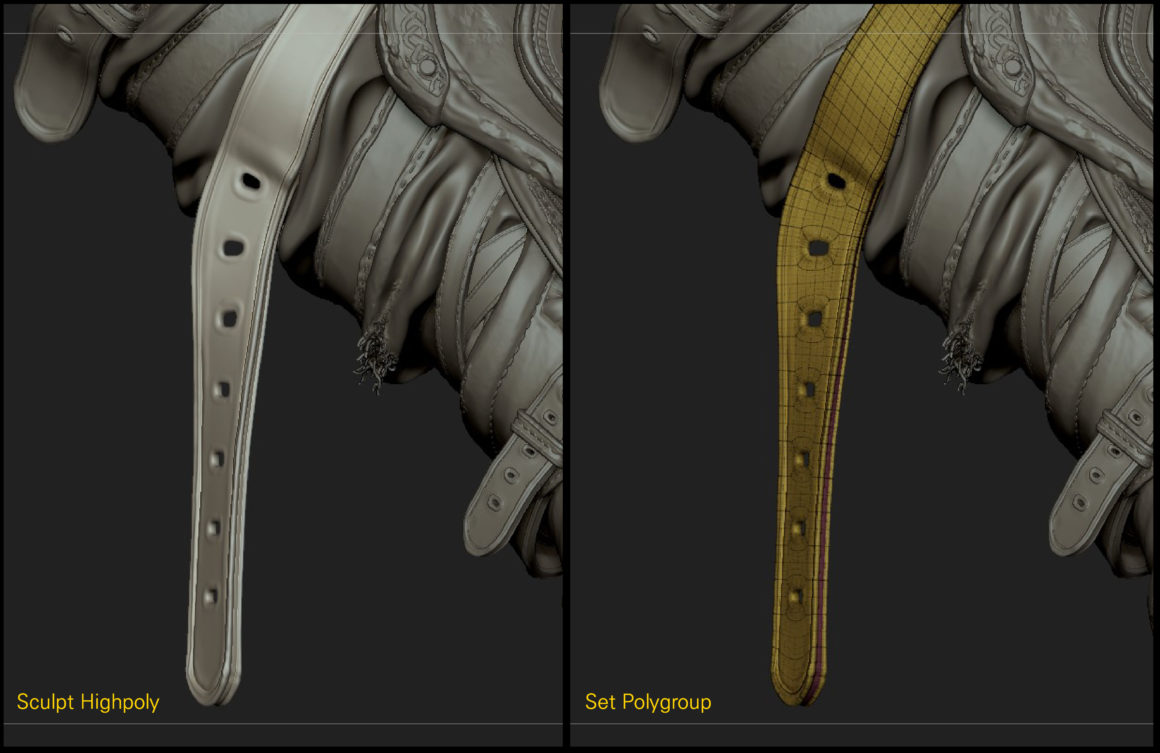
3. Think About The Story
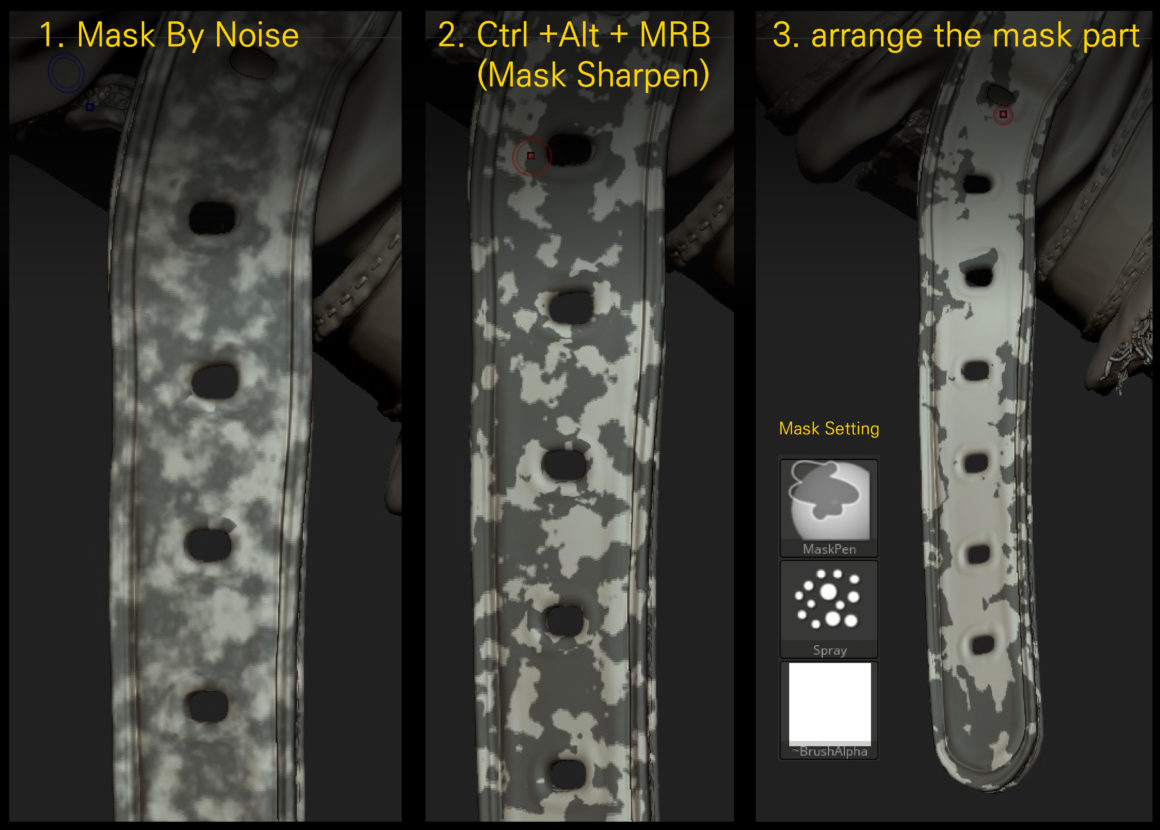
You need to think about the story of how the leather was damaged. Usually, the edges are torn and the areas where a lot of friction are torn, so the inner leather will be exposed. Overall, work with the Noise texture of the Surface. Before applying the Noise texture, raise the Subdivision Level sufficiently to secure the polygon number for detailed expression. (In my case, I secure up to 1.452 million.) Based on what I thought, I adjusted the options in Surface-Noise-Edit and masked only the areas to be torn through Mask By Noise.
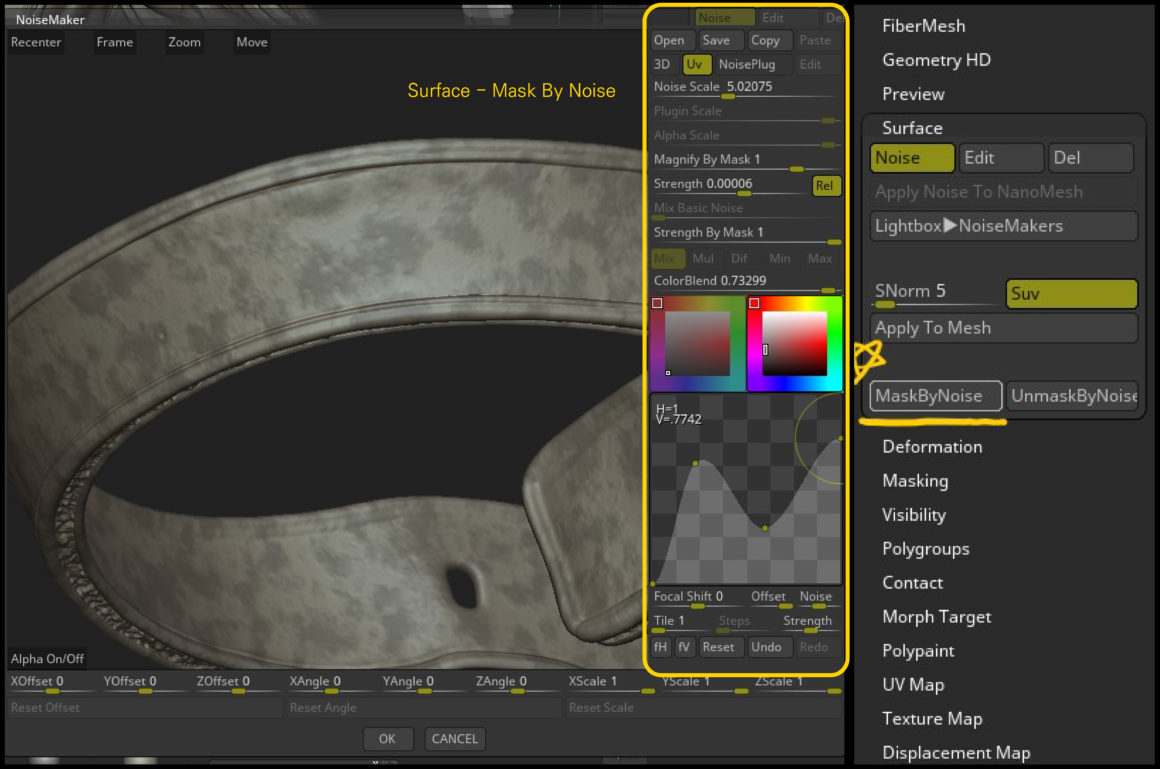
4. Masking
After sharpening the mask part through Ctrl + Alt + MRB, organize the mask again.
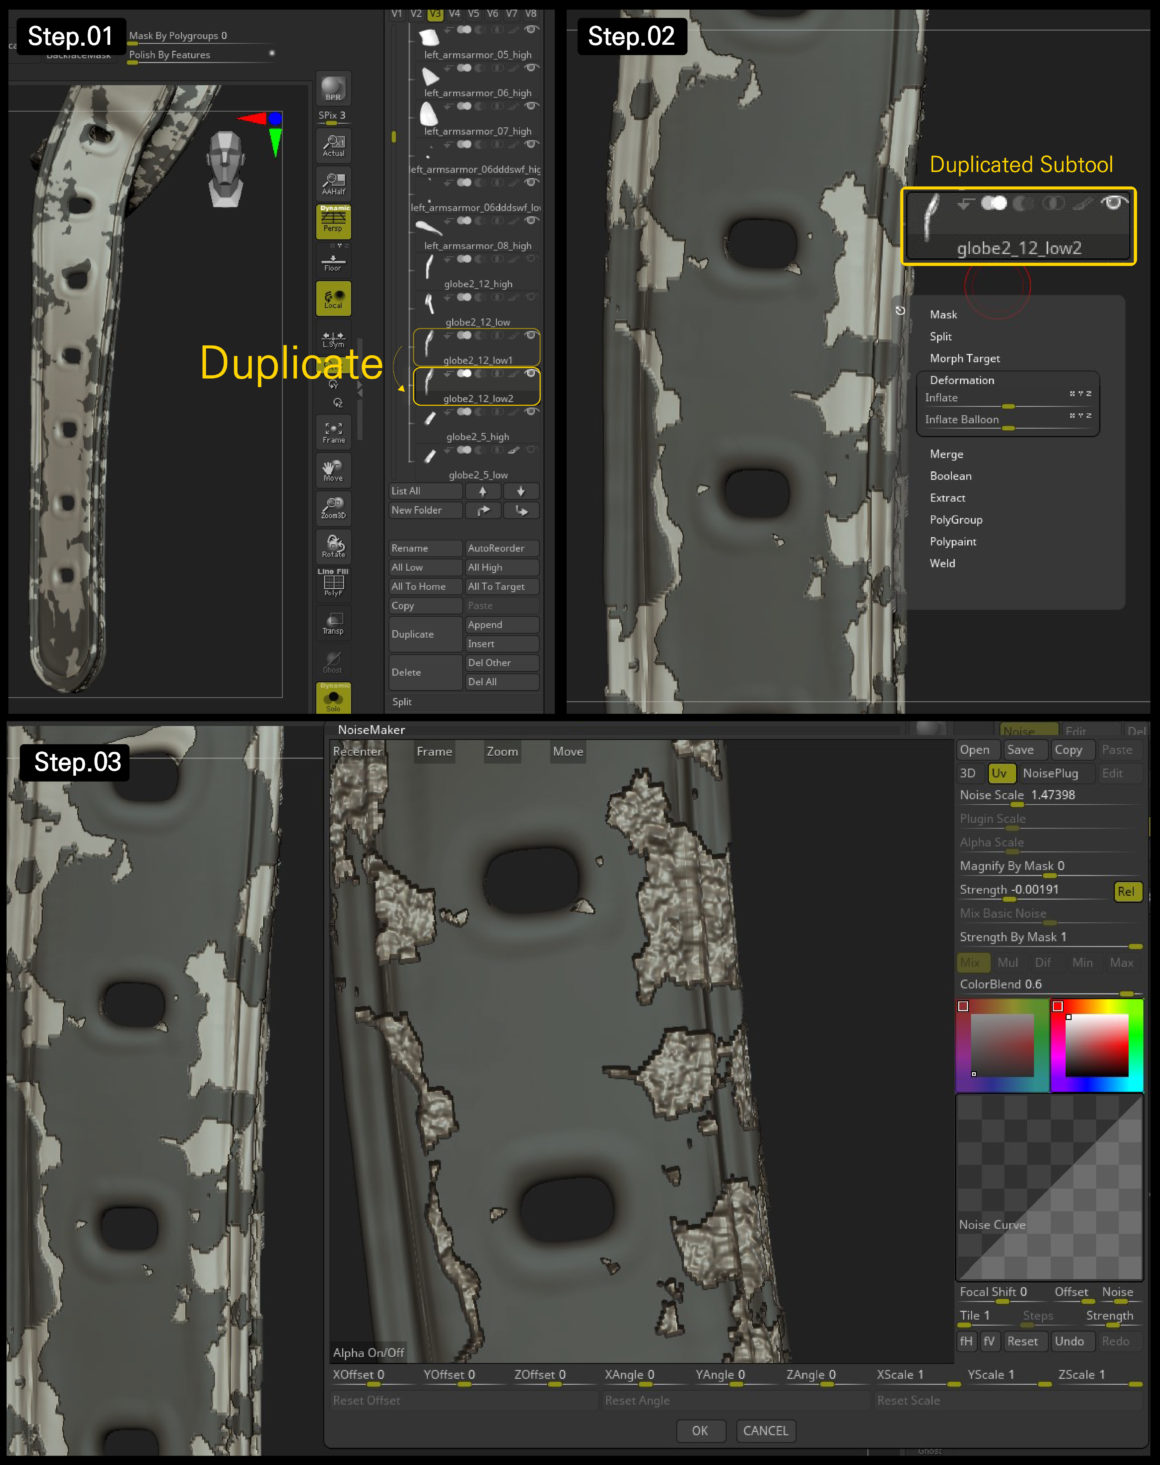
5. Duplicate Subtool
Duplicate in this state. In the Duplicated Substool, invert and inflate the Mask. And as in the previous step, express the inner skin through Surface-Noise-Edit.
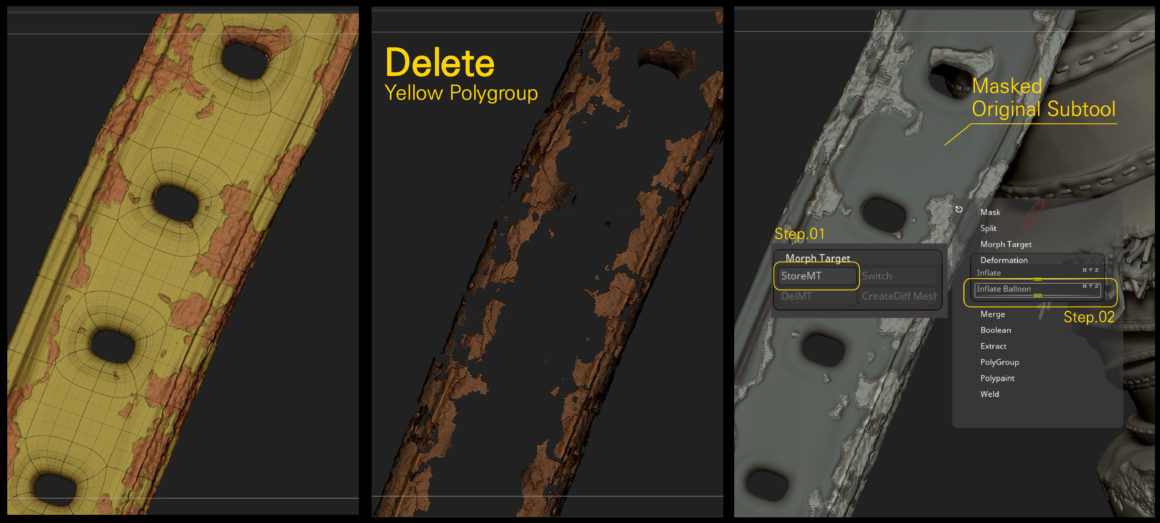
6. Express The Inner Leather
Click Ctrl+W to divide the Polygroup and delete all meshes except the inside. After that, unhide the original subtool and preserve the existing shape with Morph. Enter a negative value for the inflate balloon function to express the inner Leather.
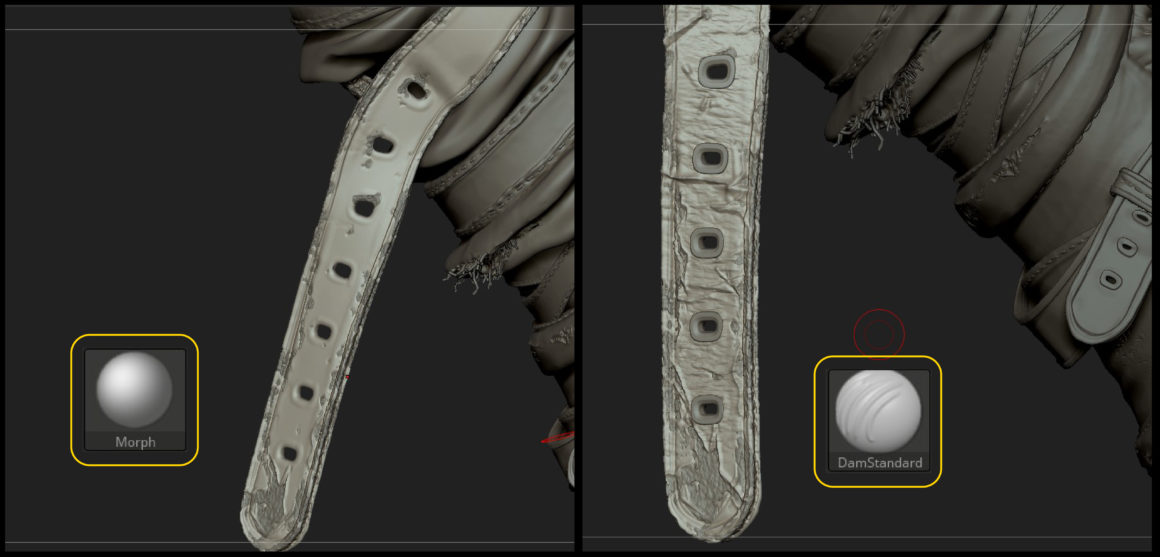
7. Morph Brush
After organizing the shape once again with the preserved Morph brush in the previous step, express the Torn Leather in detail with the DamStandard brush.
8. Baking
Baking this HiPoly will give you a great ID, Normal, AO, Curvature map.
Explore all our Quick Tip blogs.
Join our community & Get inspired by TOP artists:
Most popular Groom references


Read more about groom references or visit our website:
GET INSPIRED WITH TOP ARTISTS


