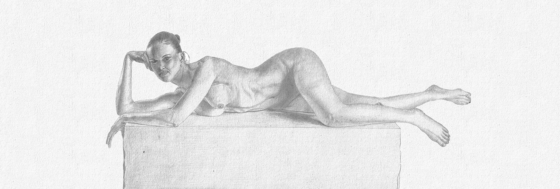
If you’re an artist or aspiring to become one, learning how to draw anatomy is essential. Anatomy is the foundation of all figure drawing and is fundamental to creating lifelike characters. However, mastering anatomy can be challenging and time-consuming. In this article, we will present Eric Luke’s speed drawings, a fantastic drill that will help you to draw anatomical figures in no time.

Why Is Anatomy Important in Figure Drawing?
Before diving into the tutorial, let’s discuss why anatomy is crucial in figure drawing. Anatomy is the study of the structure and form of living organisms, including humans. When you understand anatomy, you can draw the human form accurately and create realistic figures. Understanding anatomy also allows you to manipulate the figure’s form and create unique poses that convey emotion and movement.
Materials You Will Need
To complete this tutorial, you will need a few materials:
- Pencil
- Paper
- Eraser
- Human body PRO references – see also our blog Step-by-Step Guide to Achieving Anatomy Drawing Mastery
Step 1: Understanding the Basic Forms
The first step in speed drawing anatomy is to understand the basic forms. The human figure can be broken down into simple shapes, such as cylinders, spheres, and cubes. Eric Luke recommends practicing drawing these basic shapes to gain a better understanding of the body’s underlying structure.

Step 2: The Human Skeleton
The second step is to learn about the human skeleton. The skeleton is the foundation of the human body and provides support for the muscles and organs. Eric Luke recommends studying the skeleton to understand how the bones connect and move. This knowledge will help you create lifelike poses and movements in your figures.
Step 3: The Muscles
The third step is to learn about the muscles. The muscles are responsible for movement and give the body its shape. Eric Luke suggests studying the muscles to understand how they connect to the bones and how they change shape as the body moves. This knowledge will help you create more realistic figures with accurate muscle definitions.

Check out also Eric Luke’s fantastic drawings on his Instagram or website and support him by like and follow.
To enhance your art skills, it’s essential to practice daily and make use of exceptional high-quality photo references from sites like Female Anatomy for Artists.com
Eric Luke
Step 4: Sketching the Figure
The fourth step is to sketch the figure. Using your knowledge of the basic forms, skeleton, and muscles, you can now begin sketching the figure. Eric Luke recommends starting with simple poses and gradually working up to more complex ones. The key is to focus on capturing the overall form and movement of the figure, rather than getting bogged down in the details.
Step 5: Refining the Sketch
The fifth step is to refine the sketch. Once you have the basic form and movement of the figure down, you can start refining the sketch. Eric Luke suggests focusing on the details, such as muscle definition and facial features. However, it’s important to remember that the details should support the overall form and movement of the figure, rather than detract from it.
Step 6: Adding Value

The sixth and final step is to add value to the drawing. Value refers to the lightness or darkness of an area in a drawing. Eric Luke recommends using a pencil to create value in your drawing. By adding shading and highlights, you can give your figures more depth and dimension.
Conclusion
In conclusion, Eric Luke’s 5-minute tutorial is an excellent resource for anyone looking to speed-draw anatomy. By following these six steps, you can create anatomically accurate figures with ease. Remember to start with the basic forms, study the skeleton and muscles, sketch the figure, refine the sketch, and add value. With practice, you’ll be able to create lifelike figures that convey emotion and movement.
Join our community & Get inspired by TOP artists:
Explore DRAWINGS by Artists of the day


